This blog will provide detailed steps on how to install Selenium Webdriver.
What is Selenium Web Driver?
Selenium WebDriver is the most important component of Selenium Tool’s Suite. The latest release “Selenium 2.0” is integrated with WebDriver API which provides a simpler and more concise programming interface.
What is the process for installation?
Selenium web driver installation process comprises of 4 major steps:-
- Download and Install Java 8 or higher version.
- Download and configure Eclipse or any Java IDE of your choice.
- Download Selenium WebDriver Java Client
- Configure Selenium WebDriver.
Selenium Web Driver Installation
Let us start the installation process and we will cover each step in detail.
Download and install java
We assume that you have already installed Java 8 or above on your machine and successfully configured the environment variables required to run and compile java programs.
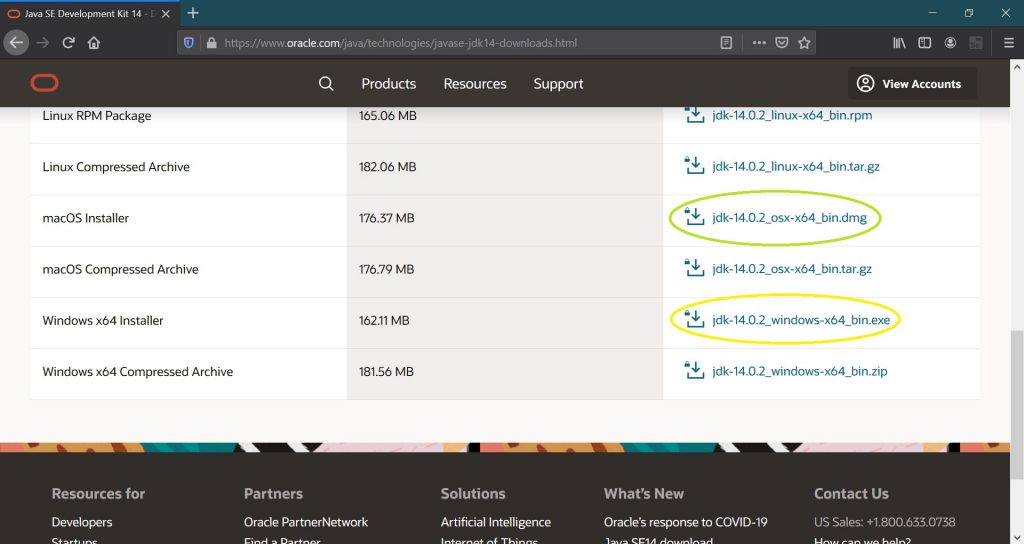
If not you can download it from
https://www.oracle.com/java/technologies/javase/javase-jdk8-downloads.html
And based upon your OS whether Windows or Mac download the version.

Download and install Eclipse
You can download Eclipse from https://www.eclipse.org/downloads/packages/release/kepler/sr1/eclipse-ide-java-developers
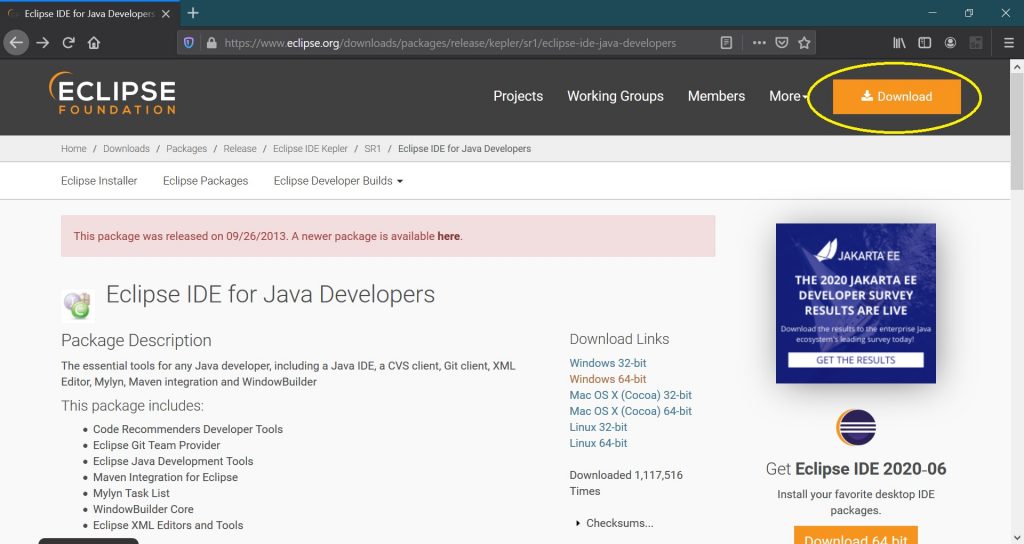
Click on the download button.
It will automatically show you the version according to your machine and OS used. Here it is showing for Windows 10 machine 64bit.
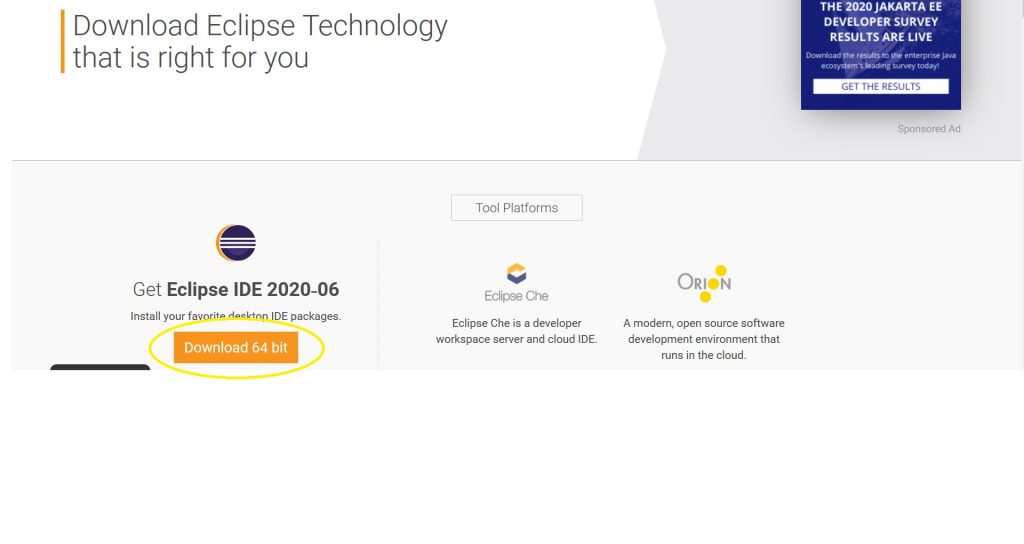
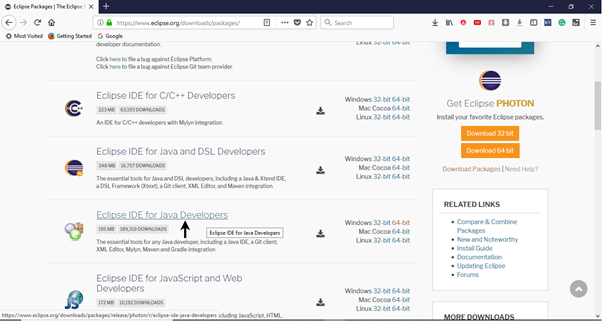
It will redirect you to the “Download Packages” section. Scroll down through the webpage and click on “Eclipse IDE for Java Developers”.

The downloaded file would be in a zipped format. Extract the contents in a convenient directory.
Double click on “eclipse” (.exe file).
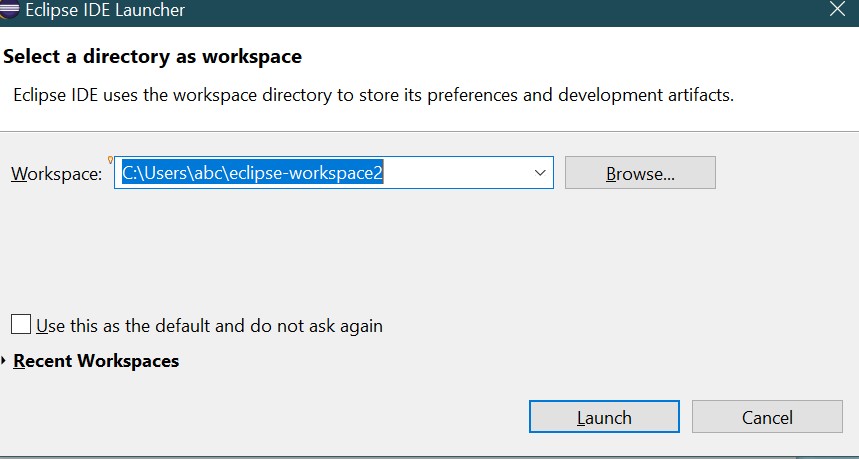
To configure the workspace, select a convenient directory where you want to keep all of your Selenium trails and click on the Launch button.

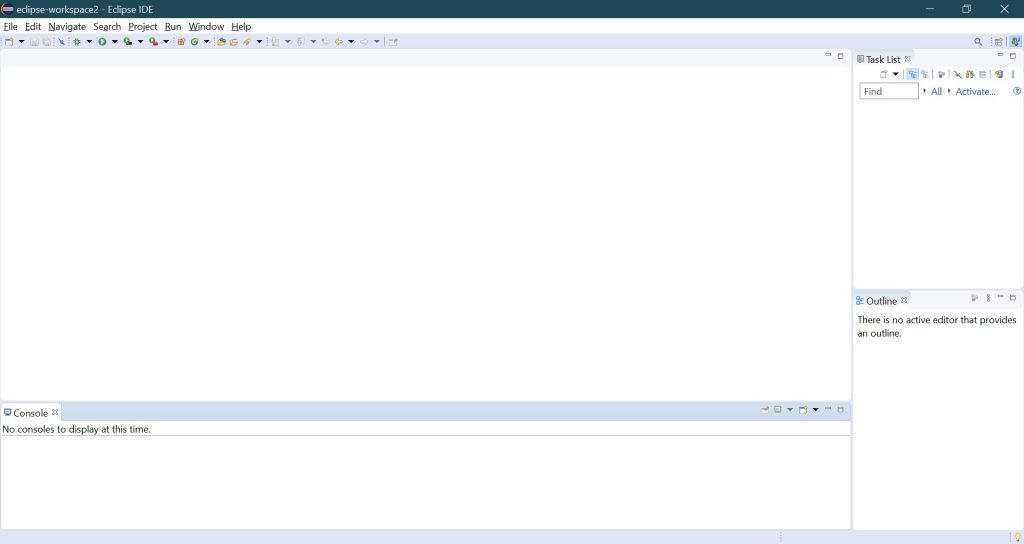
It will launch the default interface of Eclipse IDE
Download Selenium Web driver
Go to https://www.selenium.dev/downloads/
Download selenium standalone server stable version
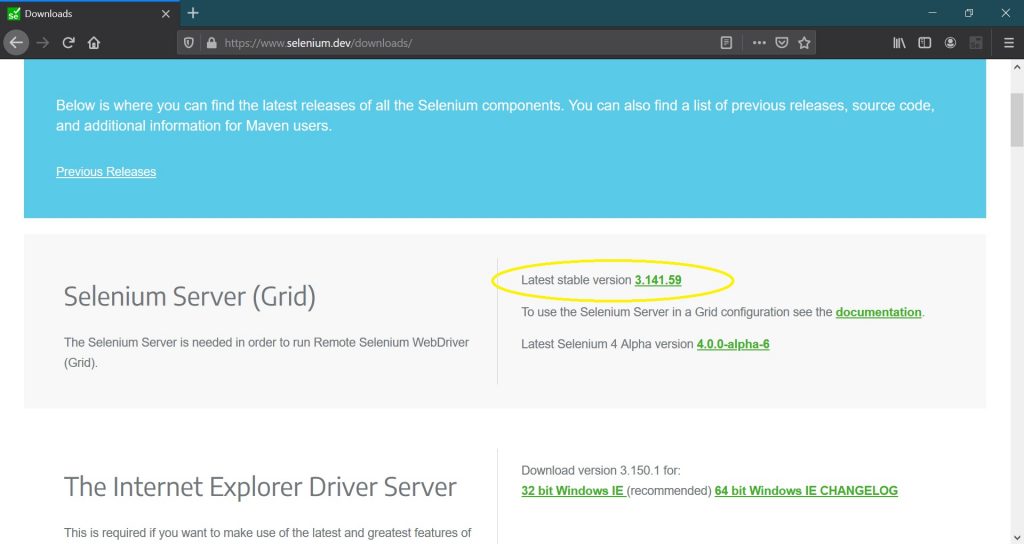
Save in your local machine.
Configure Selenium Web driver
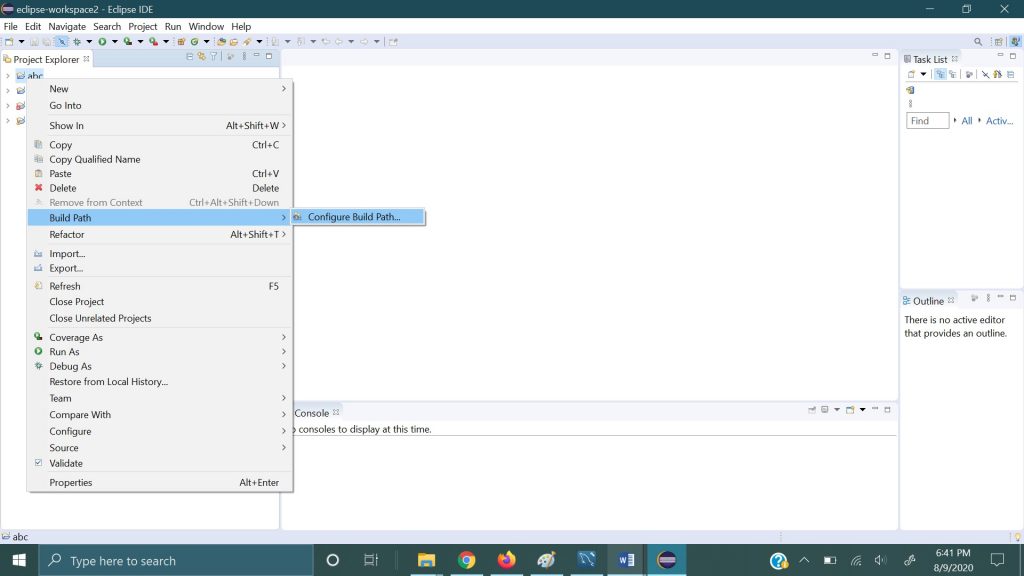
In the above step, Selenium is installed now we have to configure it.
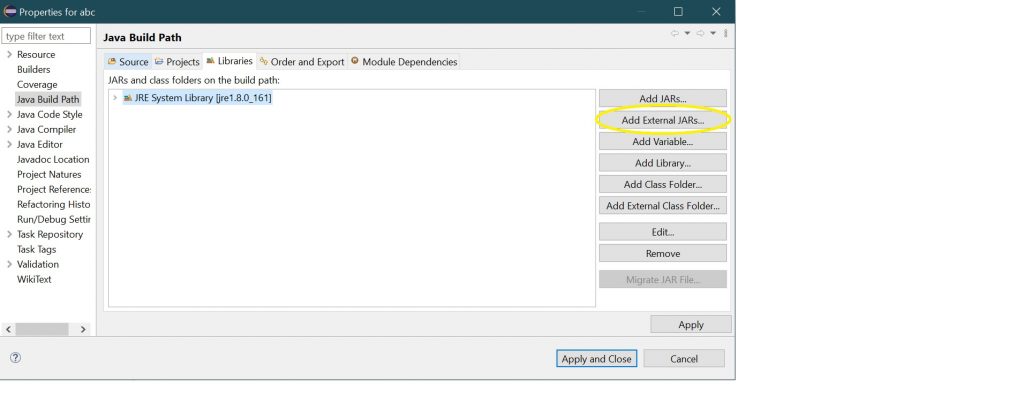
Create a new project in Eclipse and configure web driver jar files. Right-click on the project and then click on the build path and configure the build path.

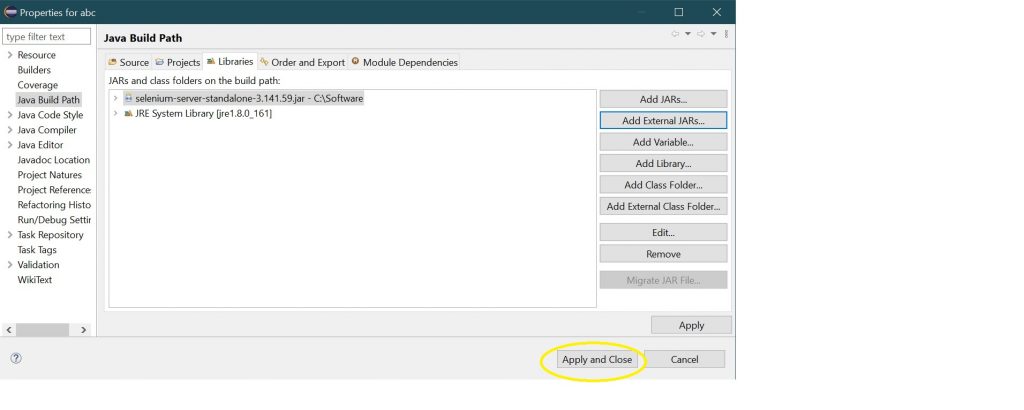
Add “selenium-server-standalone-3.141.59.jar” to your library.

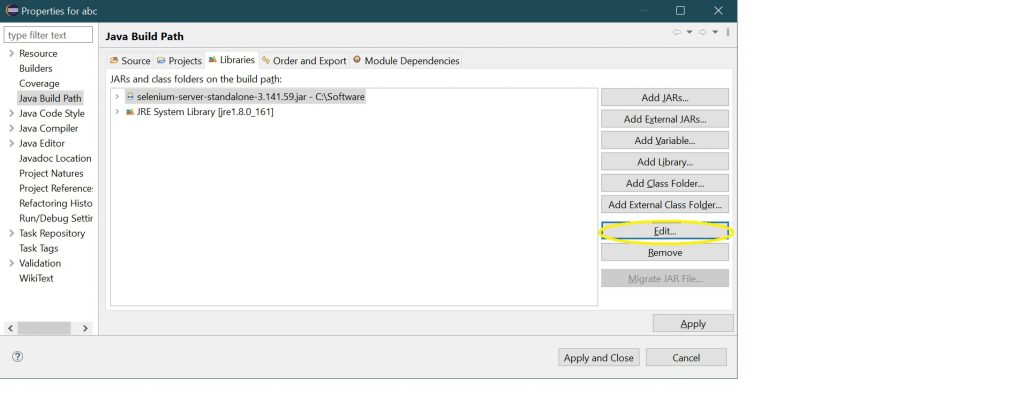
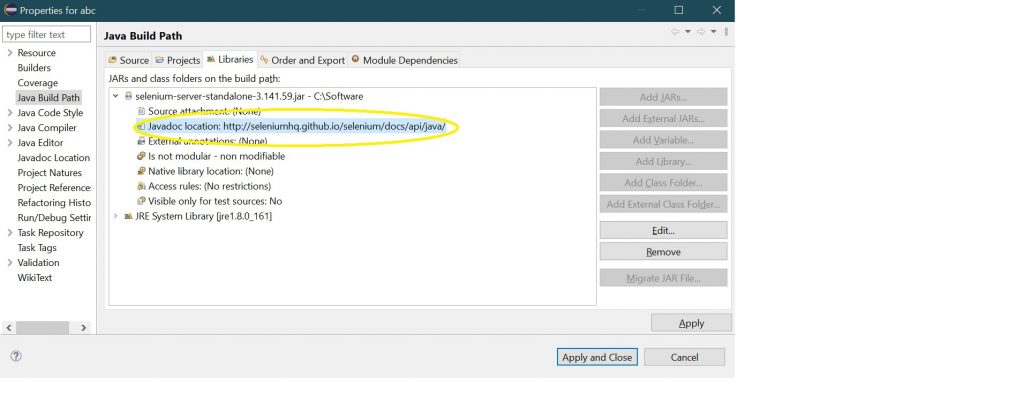
Now click on edit
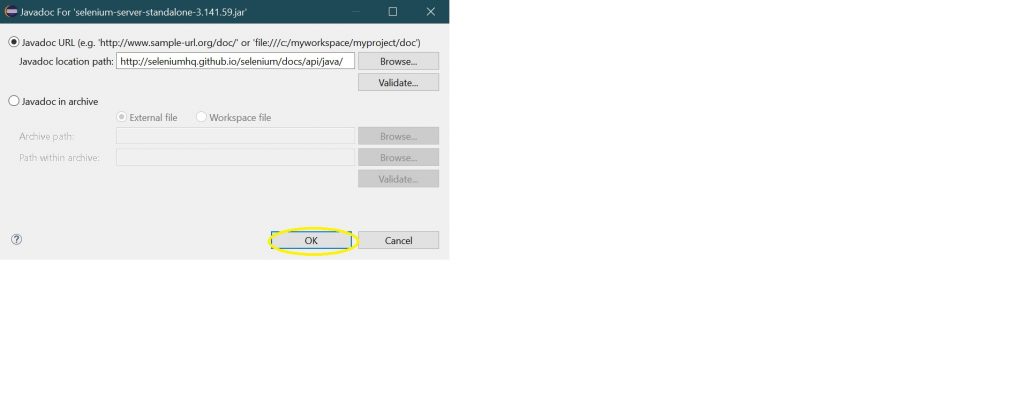
And then enter this http://seleniumhq.github.io/selenium/docs/api/java/ in the java doc location.
Now Selenium web driver is ready to be used.